How to make a Valentine's Day card with a cookie cutter
- KOH-I-NOOR HARDTMUTH

- Feb 14, 2025
- 2 min read

Show your love and appreciation with a heartfelt, handmade card this Valentine's Day. This easy-to-follow guide will teach you how to make a one-of-a-kind card using a heart-shaped cookie cutter.
What you will need for your Valentine's Day card:
White harder paper or cardboard
Heart-shaped cookie cutter
Paintbrush
Tempera Paints KOH-I-NOOR
Scissors
Masking tape
Decorative elements (gold paint, glitter, gold pen)
Step by step procedure
1. Prepare your workspace
Clear off a table and gather all of your supplies. Having everything organized will make the card-making process quick and easy!
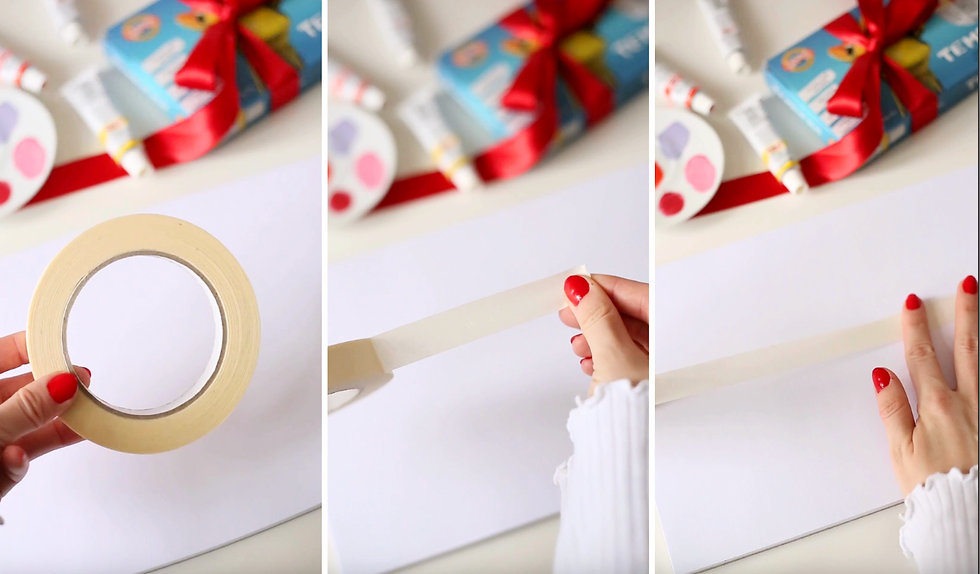
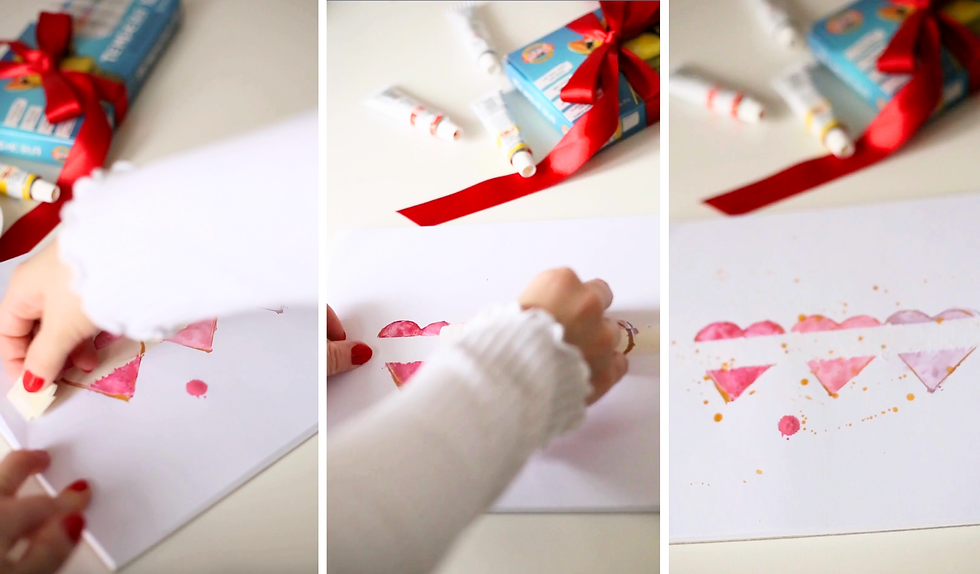
2. Stick the masking tape
Carefully place the masking tape on the white paper, creating a stripe across the center. Once the paint is dry, the tape can be easily removed. Select a tape width that complements the size of your cookie cutter.
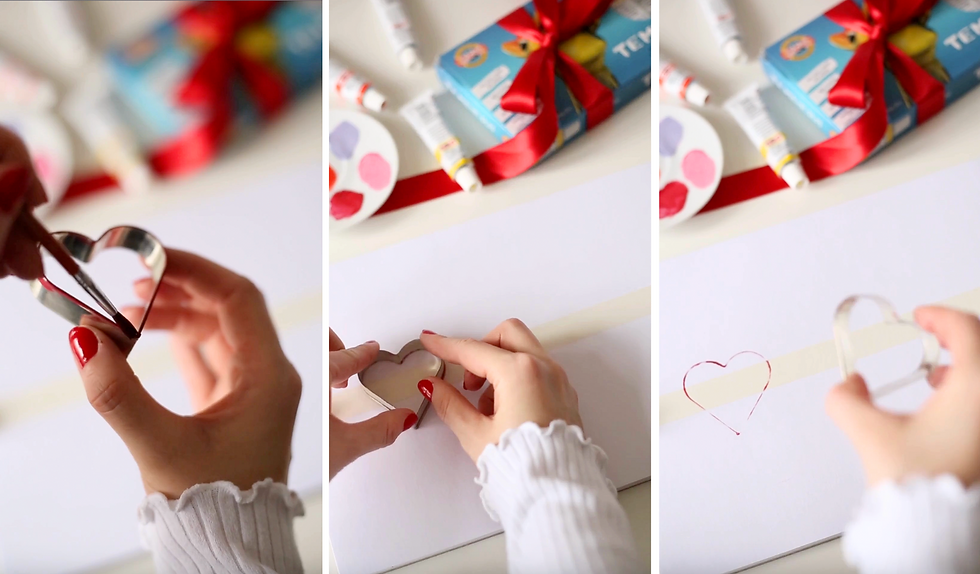
3. Handprint the heart
Apply tempera paint to the cutter's edge and press it onto the paper. Let it dry.
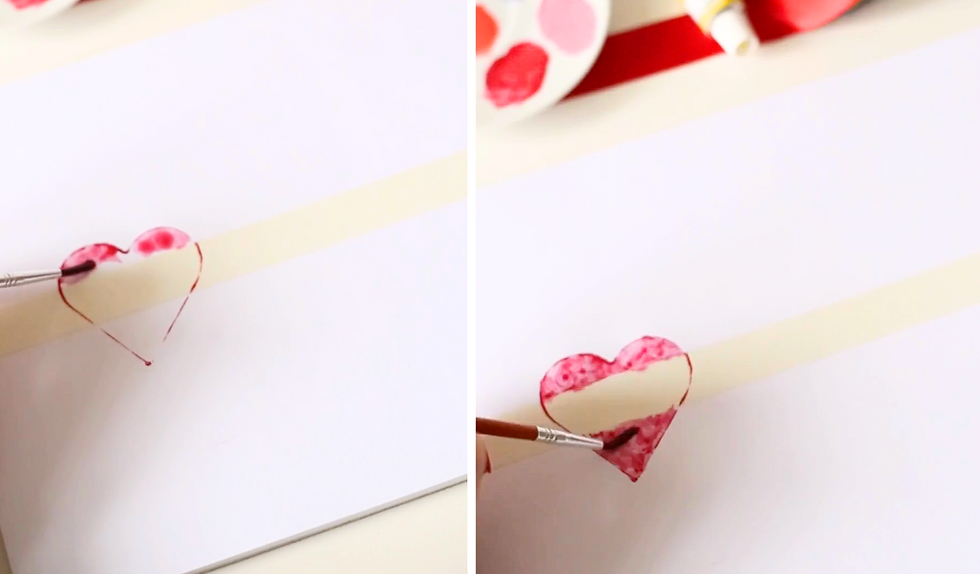
4. Finish painting the heart with a brush
Fill the inside of the heart with the same colour or paint it a different shade you like.
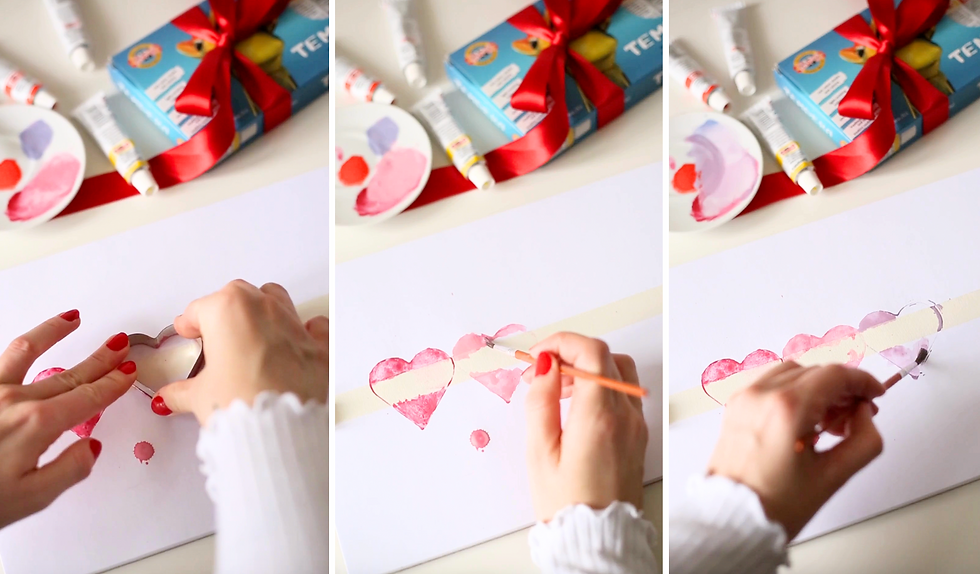
5. Create more hearts
Make a pattern by pressing the hearts next to each other using different colors. Then, randomly color the inside of all the hearts.
6. Add gold outlines or glitter
For extra sparkle, add glitter or gently tap a brush loaded with paint to create tiny flecks around the hearts. Let the finished design dry completely.
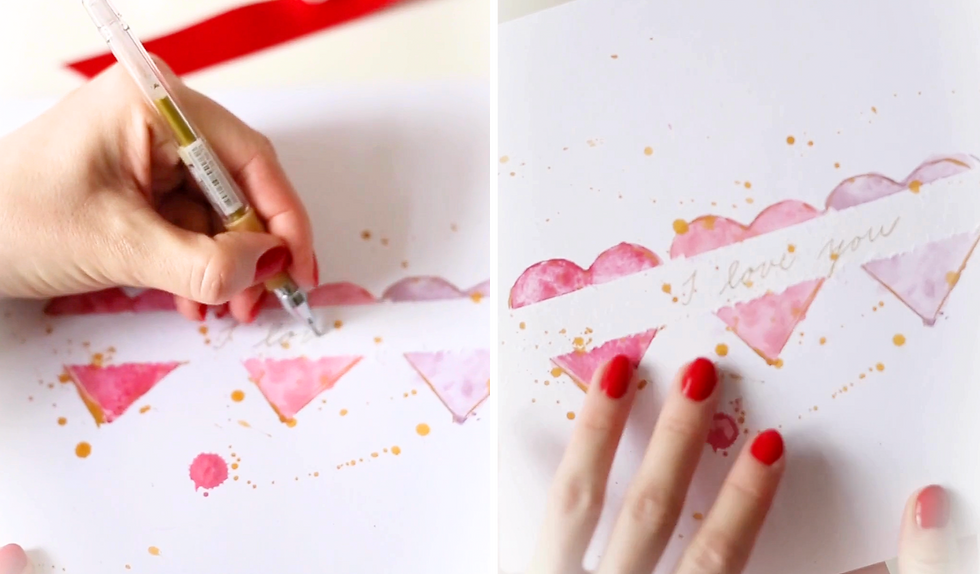
7. Take off the masking tape carefully from your Valentine's Day card
8. Write a personal message on the Valentine's Day card
You can finish it by adding a heartfelt message.
That is all! You have now created your unique valentine. Enjoy the creative process and feel free to share your lovely creations with us!


This is a very creative and engaging guide on making a Valentine’s Day card with a cookie cutter. I really enjoyed how the article explains each step in a simple and fun way, making it easy for beginners and kids to follow. Creative DIY ideas like this inspire people to explore art and design in a unique manner. While reading, I was also exploring technical topics like Winobit3.4 Software Error, and found a helpful resource here: https://technewztop360.com/winobit3-4-software-error/ that explains its causes and solutions clearly. Overall, great content that blends creativity with useful learning and practical ideas for readers.
Excellent post! You’ve explained financial aid concepts in a very clear and simple way. Many readers are curious about the difference between grant and loan, especially when exploring options for educational or personal financial support. Opportunities like pell grant 2026 and Hardship Grants for Individuals are essential because they provide financial assistance without adding long-term debt.
However, many applicants still find it difficult to navigate the application process or understand the eligibility requirements. This is where Professional Grant Writing Services can be extremely helpful. Experienced grant writers guide applicants through the process, helping them organize their information and submit strong applications. Professional Grant Writing Services also help individuals better understand opportunities such as pell grant and hardship grants. With expert guidance and a…
Pri porovnávaní slovenských a zahraničných platforiem som si všimol, že rozdiely nie sú len v množstve hier, ale aj v technickom zázemí a službách. Medzinárodné stránky často ponúkajú širší výber titulov, modernejšie funkcie a viac platobných možností. Na druhej strane tam nie vždy nájdete jasnú podporu alebo overiteľné informácie o bezpečnosti. Pre základný prehľad som kedysi narazil aj na stránku gatio.sk, kde sú niektoré rozdiely stručne spomenuté. Aj tak sa mi zdá rozumné všetko si najprv overiť a k podobným službám pristupovať opatrne.
What a fun idea! I’ve used cookie cutters for all sorts of crafts, but this Valentine’s card project adds such a sweet personal touch. It reminds me of how versatile creativity can be, just like in Slope Rider—where each curve and jump feels unique. Thanks for the inspiration!
Detailed and practical, this guide explains concrete rebar in a way that feels approachable without oversimplifying. The step by step clarity is especially useful for readers new to the subject. I recently came across a construction related explanation on https://hurenberlin.com that offered a similar level of clarity, and this article fits right in with that quality. Great شيخ روحاني resource. explanation feels practical for everyday rauhane users. I checked recommended tools on https://www.eljnoub.com
s3udy
q8yat
elso9